
How to Plan a Golf Simulator From Start to Finish
Planning a golf simulator can feel overwhelming. It’s easy to get excited about hitting golf balls at home, buy a launch monitor, and then realize the rest of the setup won’t deliver the experience you had in mind.
A successful golf simulator starts with a clear understanding of your goals, your space, and your budget. Each decision affects the next, so taking the time to plan the entire system before purchasing equipment can save you money, prevent unnecessary compromises, and make the installation process much smoother.
This guide will walk you through how to plan a golf simulator from start to finish, including the correct order for selecting each component. Whether you want a dedicated practice space, an immersive entertainment room, or something in between, following this process will help you build a simulator that works for your space and gives you the experience you want.
Start With the Experience You Want
Before comparing launch monitors, projectors, or impact screens, think about what you actually want to do with your golf simulator.
Are you mainly looking for a place to practice and get reliable feedback on your swing? Do you want to play full rounds on famous courses? Will the simulator be used for family entertainment, friendly competitions, or all of the above? There’s a big difference between a simple practice setup and a fully immersive simulator room, and knowing which experience you want will make every decision that follows much easier.
There isn’t one “best” golf simulator setup for everyone. The best setup is the one that matches how you actually plan to use it. Define that experience first, and it will be much easier to decide where to spend your money—and where you don’t need to.
Choose Your Launch Monitor Early
Your launch monitor is the heart of the simulator, so it should be one of the first major components you choose. It’s tempting to start with the screen, projector, or enclosure because those pieces are easier to picture, but the launch monitor can have a much bigger effect on how the entire setup needs to be designed.
There are a lot of options and different types of launch monitors - choosing the right one early gives you a solid foundation for the rest of the project. Once that decision is made, everything else is easier to put together.
Check out our Launch Monitor Buying Guide for a full breakdown!
Design the Simulator as a Complete System
A golf simulator isn’t just a collection of individual products. Every component needs to fit the room, work with the other equipment, and support the experience you’re trying to create. A great launch monitor won’t solve a poor layout, and an expensive projector won’t help if it can’t produce the right image from the mounting location available.
Before purchasing any of your equipment, map out the complete system. It can be helpful to sketch the room and label the location of each major component. The drawing doesn’t have to be perfect—it just needs to help you see how everything will come together. A little planning at this stage can prevent a lot of expensive changes later.
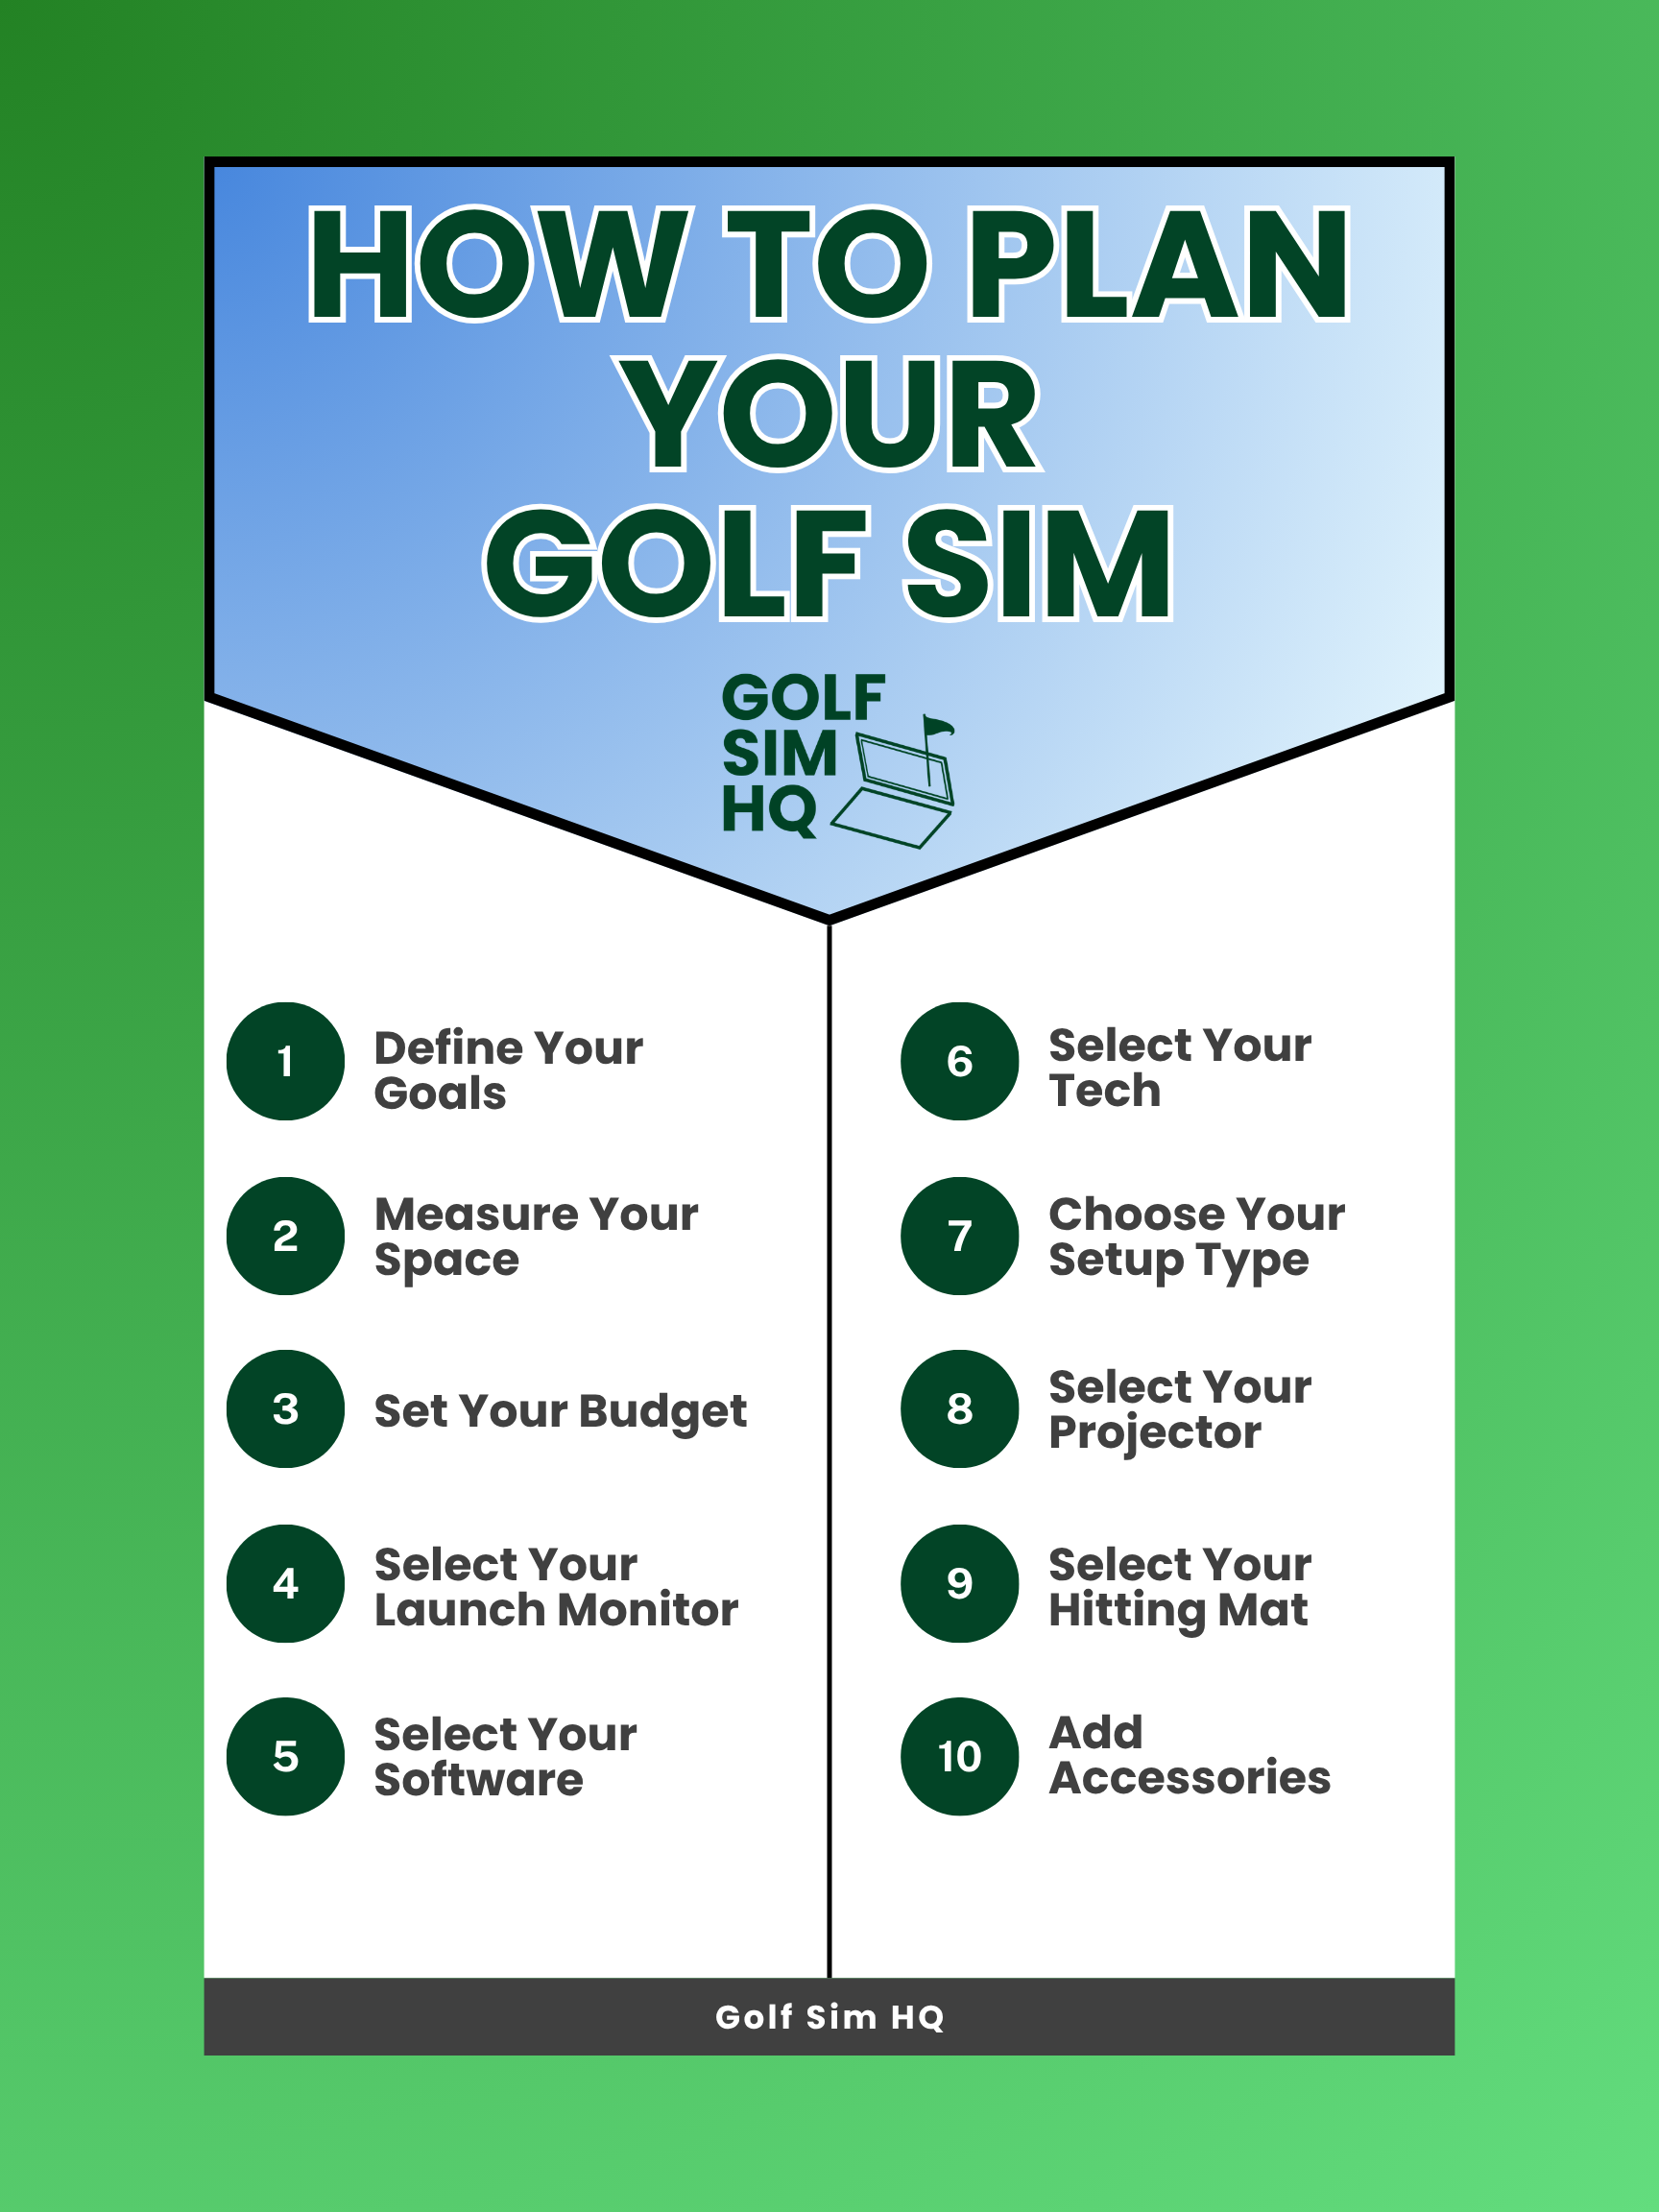
How to Plan Your Golf Sim
Following this order helps make sure each purchase works with the decisions you’ve already made. In the following sections, we’ll walk through every step and explain what you should consider before moving on to the next one.
1. Define Your Goals
Before you start shopping, take a minute to define what you want the simulator to do. You don’t need a detailed plan yet—you just need a clear idea of what a successful setup looks like for you.
Maybe your main goal is to practice more often and get reliable feedback on your distances. You might want to work through detailed club and ball data, play full rounds on virtual courses, host friends for simulator nights, or create a space the whole family can enjoy. Your simulator may need to do several of these things, but it helps to know which ones matter most.
Ask yourself a few basic questions:
Is this primarily for practice, entertainment, or both?
How often will the simulator be used?
Will you mostly hit on a virtual range or play full courses?
How many people will typically use the space?
Will both right- and left-handed golfers use it?
Does the room need to serve another purpose when the simulator isn’t in use?
Your answers will help determine which features are worth paying for. A practice-focused golfer may place more value on accurate data and a comfortable hitting mat, while someone building an entertainment space may care more about graphics, course selection, seating, and sound.
Try to finish this step with a simple statement such as: “I want a year-round practice space with accurate club data,” or “I want an immersive simulator where friends and family can play full rounds.” That goal will give you a useful reference point for every decision that follows.
2. Measure Your Space
Next, get accurate measurements of the room. You need to understand how much space is available, and if it can accommodate a sim setup. A few feet can make a big difference, so don’t rely on eyeballing it.
Think about the room from the golfer’s perspective as well. Mark a possible hitting position and make sure there is enough space to swing comfortably without reaching a wall, ceiling, or anything behind the golfer. Take out a club and take a swing. If both right-handed and left-handed players will use it, take a swing from the other side as well. It should be comfortable and easy to take a full swing.
Depth deserves extra attention. Depending on the model, a launch monitor may require a specific amount of space between the unit and the ball, as well as between the ball and the screen or net. Make sure you know the room’s full usable depth before deciding which type of launch monitor will work.
It’s sometimes helpful to make a simple sketch of the room and add all your measurements. Include anything that could affect the layout, even if it seems minor. You’ll use this information throughout the rest of the planning process, so getting it right now will make every step that follows easier.
3. Set Your Budget
Now that you know what you want and what your room can support, decide how much you’re comfortable spending on the complete setup. The key word here is complete. Don’t spend your entire budget on a launch monitor and assume everything else will work itself out later.
A common range is $3K - $5K for a solid simulator setup, but it can easily be done for less than $2K if you are working on a tighter budget.
You’ll come back to your budget as you select each component, but it’s important to have a clear idea of what you’re willing to spend in total. Every part of the setup will come with plenty of options at a wide range of prices. Decide upfront where you want to invest and where you’re comfortable saving. This will make it much easier to compare products and keep the complete project within budget.
4. Select Your Launch Monitor
With your goals, room measurements, and budget in place, you’re ready to choose a launch monitor. This is one of the most important decisions in the entire process because it will influence your software, technology, hitting position, and overall layout.
Start by narrowing the options to launch monitors that will work reliably in your space. Some units sit behind the golfer and need enough room to track the ball after impact. Others sit beside the ball or mount to the ceiling. Each style comes with different placement, lighting, and space requirements, so check those details carefully against the measurements you took earlier.
Next, think about the type of experience you want. If your main goal is game improvement, pay close attention to the ball and club data each unit provides. If you’re more interested in playing simulated courses, software compatibility and the overall ease of use may be more important. You should also consider whether the launch monitor can easily accommodate both right- and left-handed golfers.
Don’t forget to look beyond the initial purchase price. Some launch monitors require memberships to unlock certain features, and access to third-party simulator software may involve additional fees. Include those ongoing costs when comparing your options.
The best launch monitor isn’t necessarily the one with the longest feature list. It’s the one that fits your room, provides the information you care about, works with the software you want, and stays within the budget for your complete setup.
5. Select Your Software
Once you’ve chosen a launch monitor, decide which software you want to use. Start by confirming which options are compatible with your launch monitor, then compare the features of those to the experience you defined at the beginning of the process.
If your main goal is practice, you may only need the range software included with the launch monitor. This can give you the feedback you need without adding another program or subscription. If you want to play full rounds, look for simulator software with the courses, game modes, and multiplayer features that interest you.
Think about how you’ll actually use the software. Consider the course selection, graphics, practice features, online play, number of local players supported, and how easy the program is to navigate. Some golfers want the most realistic experience possible, while others care more about a simple setup they can turn on and start using quickly.
Make sure you understand the full cost as well. Software may be included with the launch monitor, sold as a one-time purchase, or offered through a monthly or annual subscription. Some features or courses may also cost extra.
Choosing your software at this stage will tell you what kind of computer or mobile device you need next. That prevents you from buying a device that can’t run the program—or spending more on technology than your software actually requires.
6. Select Your Computer or Mobile Device
Now that you know which software you want to use, you can choose the technology needed to run it. This could be a gaming computer, laptop, tablet, or phone, depending on the launch monitor and software you selected.
If your goal is simply to view shot data, practice on a virtual range, or work on your distances, a phone or tablet may be all you need. A more immersive experience with detailed graphics and a large selection of virtual courses will often require a gaming pc with a dedicated graphics card.
Check the software’s system requirements before buying anything. Pay attention to the recommended specifications, not just the minimum requirements. A device may technically run the program at the minimum level but struggle to provide the smooth, high-quality experience you’re expecting.
You should also think about how the device will connect to the rest of the simulator. Make sure it has the connections needed for the launch monitor, projector or television, internet, and any additional displays. Include any necessary cables, adapters, keyboards, or wireless controls in your plan.
Finally, decide where the device will be located. It should be easy to reach but protected from golf balls, clubs, dust, and foot traffic. A little extra planning here will keep the technology organized and make the simulator easier to use every time you turn it on.
7. Choose Your Hitting-Area Style
Next, decide what you will hit into. Your goals, room, and budget will help determine whether you need a full permanent enclosure, a simple net, or a setup that can be moved or retracted when it isn’t being used.
A net is often enough for a practice-focused simulator. It’s usually more affordable, takes up less room, and works well if you plan to view shot results on a phone, tablet, or separate television. It may not feel as immersive, but it can still give you an excellent place to work on your game.
A full enclosure with an impact screen creates a more traditional simulator experience. It allows the projected image to appear directly in front of the golfer and provides additional protection around the hitting area. This is a good fit for playing virtual courses or building a dedicated room, but it will require more space and usually a larger portion of the budget.
If the room serves more than one purpose, consider a retractable screen, retractable net, or temporary setup that can be stored when you aren’t using it.
Whichever style you choose, safety should be the priority. Think about where mishit golf balls could travel and whether the walls, ceiling, windows, and people in the room are adequately protected. Once you’ve chosen the hitting-area style and know the screen or net dimensions, you’ll have the information needed to select the right projector.
8. Select a Projector [If Needed]
If you’re using an impact screen, the next step is choosing a projector. If you’re hitting into a net and viewing your results on a phone, tablet, or television, you may be able to skip this step entirely.
Start with the size and shape of your impact screen. The projector needs to create an image that fills the screen properly without spilling onto the enclosure or leaving large unused areas. You’ll also need to know how far the projector can be mounted from the screen. This is known as the throw distance, and it can quickly narrow down your options.
Placement is just as important as picture quality. The projector should be positioned where it won’t interfere with the golfer’s swing or be struck by a ball. You’ll also want to avoid a setup where the golfer constantly casts a shadow across the screen. Depending on the room, this may mean using a short-throw projector or an offset mounting position.
Consider the amount of light in the room, the image resolution you want, and how the projector will connect to your computer or mobile device. Brighter rooms generally need a brighter projector, while a darker room gives you more flexibility.
Choose the projector based on the actual screen dimensions and mounting location—not just the specifications that look best on paper. This will help you get an image that fits the screen and looks good from the golfer’s position.
9. Select a Hitting Mat
A hitting mat may not be the most exciting part of the simulator, but it has a major effect on how the setup feels. Since you’ll be hitting from it on every shot, comfort, stability, and durability should matter just as much as price.
Choose a mat that gives you enough room to stand and swing comfortably without feeling like you’re going to step off the edge. If both right- and left-handed golfers will use the simulator, make sure the hitting surface works from either side or can be adjusted easily.
Pay close attention to how the mat reacts when the club makes contact with the ground. A quality hitting surface should feel comfortable during repeated use and provide useful feedback on heavy shots. Some golfers prefer a full-size mat, while others build a replaceable hitting strip into a larger stance mat or turf-covered platform.
The height of the mat also matters. Raising the hitting position reduces your available ceiling clearance, so include the mat thickness when confirming that the room is tall enough. If you’re installing surrounding turf, the hitting surface and stance area should sit at the same height so the golfer and ball are on a level surface.
This is one area where choosing the cheapest option can affect the entire experience. Find a mat that fits your room, matches how often you plan to practice, and feels comfortable enough for regular use.
Check out our Hitting Mat Buying Guide for help finding the right mat for you.
10. Add Accessories
Once the core simulator is planned, you can start thinking about the extras that will make the room safer, more comfortable, and easier to use. This is where you can customize the space around the way you plan to enjoy it.
Useful accessories might include:
Additional wall or ceiling protection
Improved lighting around the hitting area
A television or second display
Speakers or a sound system
Couches or additional seating
Club and ball storage
A keyboard, mouse, or touchscreen
Swing cameras
Acoustic panels
A ball tray or automatic ball return
Decorative lighting, signs, or other finishing touches
Start with the accessories that improve safety or solve a practical problem. Extra protection, lighting, storage, and simple controls can make a bigger difference than purely decorative upgrades.
You also don’t need to purchase everything before the simulator is installed. In many cases, it’s better to use the space for a while and see what’s missing. After a few practice sessions or rounds with friends, you’ll have a much clearer idea of which upgrades will genuinely improve the experience.
Accessories are the finishing touches, not the foundation. Get the main system working well first, then add the features that make the simulator feel like your own.
Common Planning Mistakes to Avoid
Even a well-planned golf simulator can run into problems if a few important details are overlooked. Here are some of the most common mistakes to watch for.
Buying equipment before measuring the room
A product may look perfect online but still be a poor fit for your space. Get accurate measurements first, then use them to narrow down your options.
Spending too much of the budget on one component
The launch monitor may be the heart of the system, but you still need a hitting area, mat, software, and compatible technology. Plan the complete budget before making a major purchase.
Choosing components independently
A launch monitor, software package, computer, screen, and projector may all be good products on their own, but that doesn’t guarantee they’ll work well together. Treat the simulator as one connected system.
Treating projector placement as an afterthought
Your screen size, room depth, mounting location, and golfer position all affect which projector will work. Plan the projector and cable locations before the room or enclosure is fully installed.
Overlooking outlets, cables, and internet access
Make sure power and data connections are available where the launch monitor, computer, projector, displays, and accessories will be located. Planning this early is much easier than running cables across a finished room.
Underestimating swing and ball safety
Leave enough room for every golfer to swing comfortably, and think about where a mishit ball could travel. Walls, ceilings, windows, equipment, and anyone watching should all be protected.
Forgetting about ongoing costs
Software subscriptions, launch monitor memberships, course packages, and future upgrades can add to the long-term cost. Include them when deciding what fits your budget.
Trying to finish everything at once
You can always add upgraded seating, speakers, lighting, and décor later. Focus on getting the core simulator right first, then improve the room as you learn how you actually use it.
Your Golf Simulator Planning Checklist
Before you start ordering equipment, use this checklist to make sure you’ve covered the major decisions.
Define whether the simulator will be used primarily for practice, entertainment, or both.
Measure the room and take note of any limitations.
Set a total budget for the complete simulator.
Decide where you want to invest and where you’re comfortable saving.
Select a launch monitor that works within your available space.
Confirm that the launch monitor provides the data and features you want.
Choose compatible simulator software and account for any recurring fees.
Check the software requirements before choosing a computer or mobile device.
Decide between a net, impact screen, full enclosure, or retractable setup.
Select a projector based on the screen size and available mounting distance, if needed.
Choose a hitting mat that fits the room and feels comfortable during regular use.
Plan your power, internet, lighting, cables, and equipment locations.
Add protection for walls, ceilings, windows, equipment, and anyone in the room.
Confirm that all major components are compatible before placing your orders.
If you can confidently check off each item, you’re in a good position to move forward with a simulator that fits your room, your goals, and your budget.
Final Thoughts
Building a golf simulator doesn’t have to be overwhelming. The key is to slow down at the beginning, understand what you want from the space, and make each decision in the right order.
The best simulator isn’t necessarily the one with the most expensive launch monitor, the largest screen, or the longest list of features. It’s the one where every component works together to create the experience you want. Your goals, room, and budget should guide the project—not whatever piece of equipment happens to be the most exciting at the moment.
Take the time to measure carefully, check compatibility, and plan the complete system before you start buying. When you do, the installation will be much smoother, you’ll avoid costly surprises, and you’ll end up with a golf simulator you’ll enjoy using for years.
